

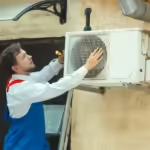
Your air conditioner is more than just a machine that cools your home; it’s an essential component of your living environment. When it’s running smoothly, you probably don’t give it a second thought. However, a neglected AC unit can quickly become a source of discomfort, health concerns, and unexpected expenses. Regular maintenance isn’t just a good idea – it’s crucial. This guide will walk you through the detailed steps of cleaning your air conditioner, ensuring it operates at peak efficiency, and extends its lifespan.
Why Regular Maintenance Is Essential for Your AC
Regular maintenance of your air conditioner is akin to routine health check-ups for your vehicle or yourself. Over time, dust, dirt, and debris accumulate, causing your AC to work harder and less efficiently. Routine cleaning and upkeep can prevent these issues, helping to avoid breakdowns and extend the lifespan of your unit. Moreover, a well-maintained AC system ensures that the cooling is consistent and effective, providing a comfortable living environment.
Tools and Supplies You’ll Need your AC cleaning
Before you begin the cleaning of your air conditioner, gather all the necessary tools and materials. This not only makes the job easier but also ensures that you don’t damage any components by using the wrong materials. Here’s what you’ll need:
- Screwdrivers (flathead and Phillips): For removing panels and accessing internal components.
- Soft Brush: Ideal for dusting off delicate parts.
- Vacuum with Soft Brush Attachment: To gently remove dirt and debris from sensitive areas.
- Fin Comb: To straighten bent fins and restore airflow.
- Coil Cleaner or Mild Soap and Water: For cleaning coils without damaging them.
- Garden Hose with Gentle Spray Nozzle: To rinse external components safely.
- Wet/Dry Vacuum: For unclogging the drain line and other thorough cleaning tasks.
- Protective Gloves and Safety Goggles: To ensure safety while handling cleaning agents and components.
A Step-by-Step Guide to Cleaning and Maintaining Your Air Conditioner
1. Prepare for Maintenance
- Safety First: Always start by turning off the power to your air conditioner. This prevents any risk of electrical shock or damage during cleaning.
- Understand Your Unit: Familiarize yourself with your AC’s main components, including the condenser coils, evaporator coils, and air filter.
- Review the Manual: Check the manufacturer’s manual for specific maintenance instructions and guidelines tailored to your unit.
2. Clean the Exterior
- Clear the Area: Remove any debris or obstructions around the outdoor unit. This ensures proper airflow and prevents overheating.
- Wipe Down the Unit: Use a damp cloth to clean the exterior of the air conditioner, removing dust and grime.
- Straighten Bent Fins: Use a fin comb to carefully straighten any bent fins on the condenser unit to restore proper airflow.
- Clean the Condenser Coils: Rinse the coils with a garden hose and apply a coil cleaner to remove built-up dirt, following the product’s instructions.
3. Maintain the Air Filter
- Identify the Filter Type: Determine whether your filter is reusable or disposable.
- Remove and Inspect: Take out the filter and check for dirt and damage.
- Clean Reusable Filters: Vacuum off loose dust and rinse with warm, soapy water. Allow the filter to air dry completely before reinstalling.
- Replace Disposable Filters: If the filter is disposable, replace it with a new one that matches the size and specifications of the old filter.
4. Deep Clean the Interior
- Access the Evaporator Coils: Remove the panel to reach the evaporator coils inside the indoor unit.
- Clean the Coils: Brush off dust and apply a coil cleaner. Rinse gently with water and let the coils dry completely.
- Unclog the Drain Line: Check the drain line for blockages. Use a mixture of vinegar and water or a wet/dry vacuum to clear any obstructions.
- Clean the Blower Fan: Remove dust from the blower fan using a soft brush or vacuum. Ensure the fan blades are free of debris for smooth operation.
5. Reassemble and Test Your AC
- Reassemble the Unit: Carefully replace any panels or covers that were removed during cleaning. Ensure all screws and fasteners are secure.
- Power Up: Turn the power back on and observe the air conditioner as it starts up.
- Test Performance: Check for proper cooling, listen for unusual noises, and verify that airflow is consistent.
6. Adopt Seasonal Maintenance Habits
- Regular Filter Checks: Clean or replace the air filter every 1-3 months, depending on usage and environment.
- Routine Exterior Cleaning: Regularly clear debris from the outdoor unit and ensure it remains unobstructed.
- Professional Inspections: Schedule an annual check-up with a certified HVAC technician to address any issues that may not be apparent during routine maintenance.
7. Know When to Call a Professional
- Persistent Issues: If you experience unusual noises, reduced cooling efficiency, or frequent breakdowns, it’s time to consult a professional.
- Complex Problems: Leave complex repairs and refrigerant handling to certified HVAC technicians to avoid potential damage or safety risks.
By following these steps, you’ll ensure your air conditioner stays in excellent condition, providing reliable cooling and efficient performance. Regular maintenance not only extends the life of your unit but also enhances your comfort and peace of mind.